

In this tutorial, we'll go over how to query or save data to already-existing database tables using JdbcTemplate and then expose those operations using REST APIs.
Using JdbcTemplate, we can run queries and stored procedures from our JAVA code and gain low-level database access.
We'll be working with a sample MySQL database. Here are a couple of sample MySQL databases. I used the classicmodels sample database. This website contains the database and installation instructions. This database contains several tables, but for this tutorial, we will only use the Customers table.
Create a Spring Boot Project
We created a new Spring Boot project with Spring Initializr, which will generate the basic structure of our Spring Boot project. The pom.xml file for this project is as follows:
We have added the following dependencies:
Spring Boot DevTools - necessary development tools
Rest Repositories - to expose Spring Data repositories over REST. JDBC API - Database Connectivity API that defines how a client may connect and query a database.
MySQL Driver - JDBC driver for MySQL (for other DB you have to choose that dependency for that DB)
Springdoc OpenAPI - for Swagger UI.
Connect to the Database
In the application.properties file, we mentioned the MySQL database configurations and some Swagger OpenAPI-related configurations:
JdbcTemplate Configuration
In the config package, we created a class called ApplicationConfiguration to configure the JdbcTemplate:
The annotation @Configuration indicates that this class contains one or more beans that can be used throughout the project.
We declared two beans using the @Bean annotation: dataSource and jdbcTemplate. The spring context will manage these beans, and we will not need to create a new instance each time we use them.
The @ConfigurationProperties annotation is used to construct the datasource by reading the application.properties file's spring.datasource property values.
We use the @Qualifier annotation to specify the datasource bean as our DataSource when creating a new instance of JdbcTemplate.
Customer Model
To begin, we create a CustomerModel class in the controller package to hold the data from the customer table. Here's our CustomerModel class from the model package:
We use some columns to map in CustomerModel, but you are free to map other columns from the Customer table.
Repository
Make a repository package and add the CustomerRepository interface to it. The CustomerRepository interface defines a collection of abstract methods for performing database CRUD operations:
Repository Implementation
We now add the CustomerJDBCRepository class to the repository package. This class will implement the CustomerRepository interface and will have complete control over all CRUD operations:
CustomerRowMapper, an inner class that implements the RowMapper interface, has been declared. Because RowMapper has a method for mapping rows to objects, we override the mapRow() method, which maps rows from the ResultSet to CustomerModel. CustomerRowMapper is a database retrieval tool that can return a single or a list of customer records.
Use jdbcTemplate.queryForObject() to retrieve a single row or value. We are only concerned with the count(*) value in this case.
To retrieve the data, we used the query() method of JdbcTemplate, which will retrieve the records from the database based on the SQL query and map the records to CustomerModel objects using CustomerRowMapper.
The update() method of JdbcTemplate is used to perform insert, update, and delete operations, and it accepts a string containing your SQL query and values as arguments.
Controller
Make a controller package that contains the CustomerController class:
The @RestController annotation is added to the controller class, informing Spring Boot that this is a REST-based service and that the request/response data will be serialized or deserialized to JSON automatically.
The request base path was specified in @RequestMapping as /api/customer. The @RequestMapping annotation informs the Spring container that the specified HTTP endpoint is available for this service.
@Tag is an Open API annotation that allows you to change resource details like the resource name and description.
Another Open API annotation is @Operation, which is used to customize the API's name and description.
@ApiResponses is another Open API annotation that specifies the API response format, such as success and error response formats.
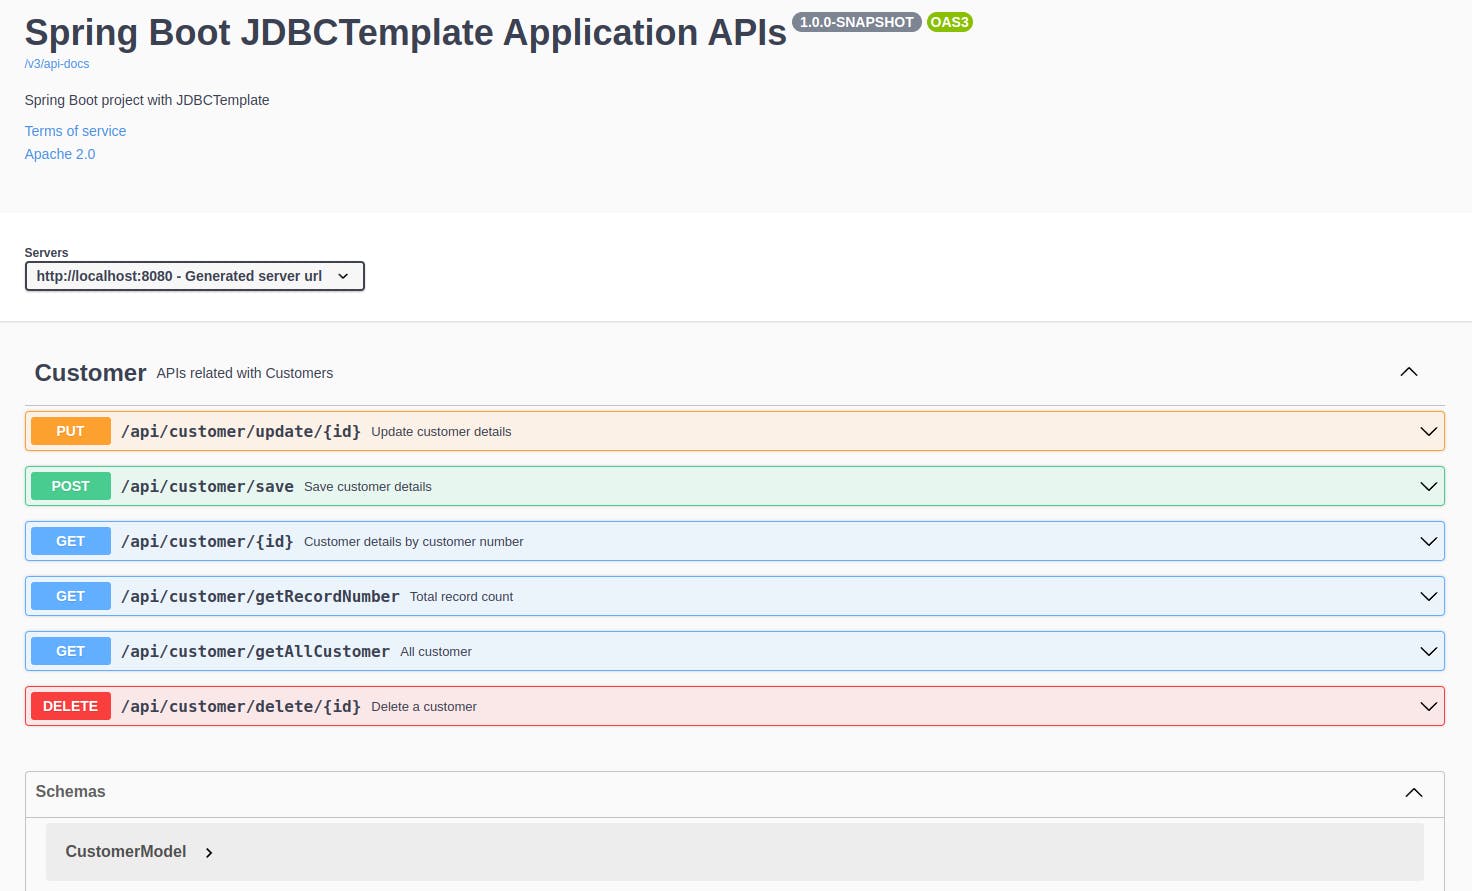
Run the application now. The Swagger UI is accessible at http://localhost:8080/swagger-ui/index.html, where we can see a list of APIs:
You can download the source code.
Happy coding!!!